Solution for ClassNotFoundException-How to add jar file in eclipse java project
This tutorial shows how to add java jar to Class path of Eclipse project. This is same process for all java Projects including Java Web Project or Any static project.
If Java jar file is not imported for specific projects you will get ClassNotFoundException Exception. So adding jar to class path is the solution for this Exception.
- java – How do I resolve ClassNotFoundException?
First find out the Jar file from Google and Download it in you PC. Search for the exact Exception message in google so that it will take you to Jar download page. After Downloading the jar, Follow the below step to add the jar into the Eclipse Class Path.
Example Error Message,java.lang.ClassNotFoundException: com.mysql.jdbc:Driver
-
After Creating the project in Eclipse. Go to the properties of the project by Right Click > Properties.
You will get the below Properties window.
2.1 Go the Java Build Path
2.2 Select Libraries Tab
2.3 Click on Add External Jars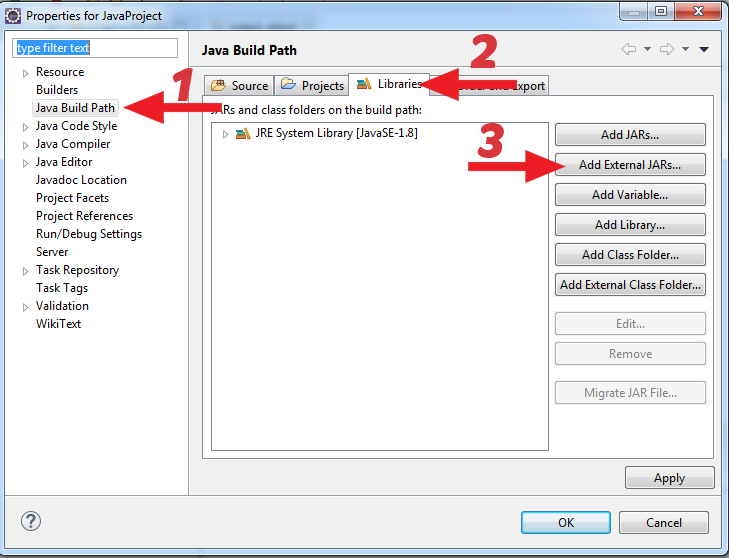
-
After Selecting Add External Jars. Navigate to location where your Jar File is Stored and Click open.

-
After opening the Jar. You can see the imported jar in the Libraries as shown below. Then click OK.

-
After importing the Jar. New referenced library package will come in the Project as shown.

0 Comments
Comments
Leave a Comment