JSF Hello World Project in Eclipse IDE JSF Tutorial Part 3
How to make Eclipse IDE supports JSF.
This tutorial shows how you can Create a JSF Hello World project in Eclipse IDE.
- Start a normal Dynamic Web Project in Eclipse IDE

- After Creating the project. Go the properties of Project.
2.1 Select Project Facets
2.2 Select JavaServer Faces
2.3 Select Further Configuration Available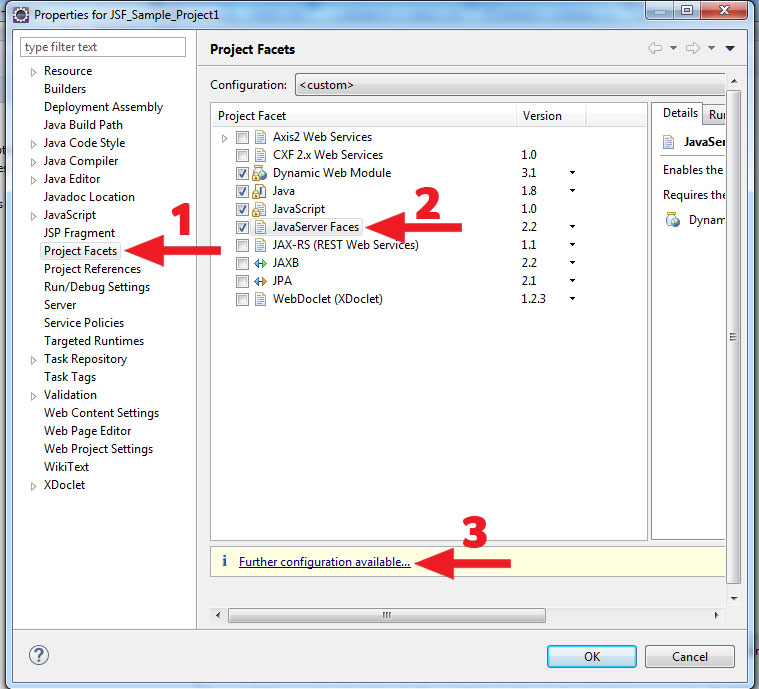
- 3.1 Select type as UserLibrary
3.2 Click on Manage Library
- 4.1 Click on new User Libraries
4.2 Give any name for the new Library and Click Ok
- Click on Add External JARS and jsf-impl-2.0.4.jar, jsf-api-2.2.0.jar to the Class libraries.

- Right Click on the Project and Create a new File as index.xhtml in WebContent Page

- Project Structure is as shown.

- Copy the below code to index.xhtml
<?xml version="1.0" encoding="ISO-8859-1" ?> <?xml version="1.0" encoding="ISO-8859-1" ?> <!DOCTYPE html PUBLIC "-//W3C//DTD XHTML 1.0 Strict//EN" "http://www.w3.org/TR/xhtml1/DTD/xhtml1-strict.dtd"> <html xmlns="http://www.w3.org/1999/xhtml" xmlns:c="http://java.sun.com/jsf/core" xmlns:ui = "http://java.sun.com/jsf/facelets" xmlns:h = "http://java.sun.com/jsf/html"> <head><meta http-equiv="Content-Type" content="text/html; charset=ISO-8859-1" /> <title>Insert title here</title> </head> <h:body> <h:outputLabel value="Hello World"></h:outputLabel> <h:form> Enter Name : <h:inputText></h:inputText><br></br> <h:commandButton value="Submit"></h:commandButton> </h:form> </h:body> </html> - Now Run the project as Server. You will get the below output. This page has a form just to demonstrate the jsf code.
It is wont work if you click.
http://localhost:8080/JSF_Sample_Project1/faces/index1.xhtml
- Download the Project here.JSF_Sample_Project1
0 Comments
Comments
Leave a Comment